
Ops & Automation
Serve the Front End from Cloudflare with gcms
Keep the admin and database on your server, while Cloudflare serves the public static site. Faster reads, clearer boundaries, and controlled sync.
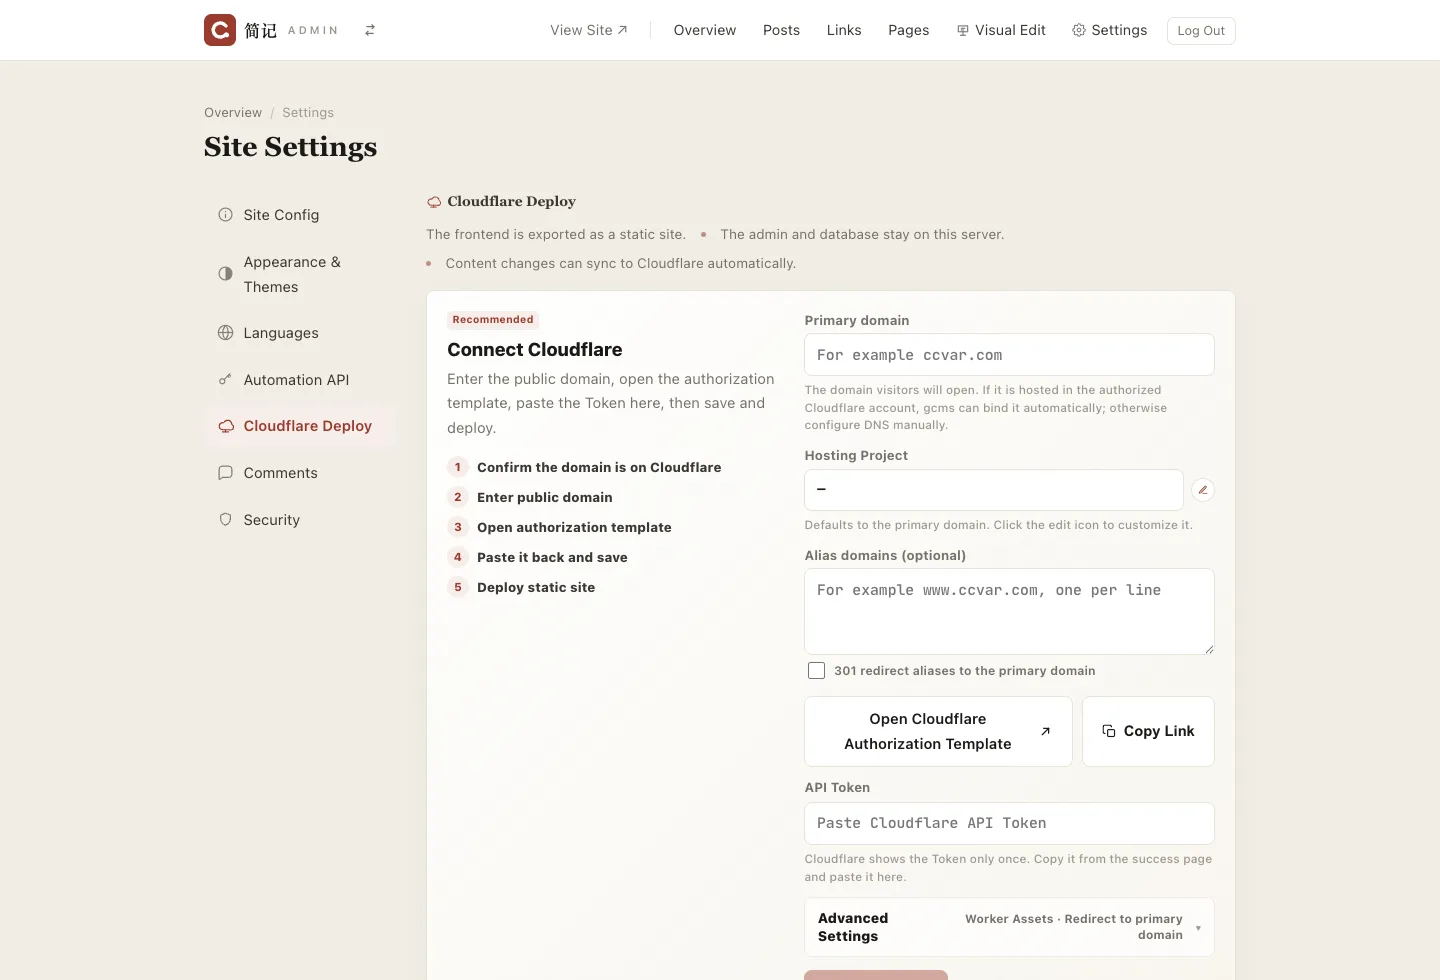
If you want faster public pages without putting your admin, database and uploads directly in the path of public traffic, Cloudflare deployment is one of the first gcms features worth trying.
The idea is simple: move the public front end to the edge, keep the admin on your own server. Visitors read static pages hosted by Cloudflare; you still write posts, change themes, manage links and preview drafts inside gcms.
What it solves
Self-hosted content sites often run into two concerns: every public request hits the origin, and the public front end shares an entry point with the admin. gcms separates them. Readers use the Cloudflare-hosted static site; administrators keep using the original admin.
Benefit 1: a faster public front end
After deployment, posts, categories, links, RSS, sitemap, CSS, JS and public images are exported as static files and uploaded to Cloudflare. Most visitor traffic no longer travels back to the origin, so a small VPS can focus on admin workflows and content maintenance.
Benefit 2: a cleaner security boundary
Cloudflare serves only the public front end. Admin login, the SQLite database, draft previews, automation APIs and upload handling remain on the gcms server. Public reading and private management become two separate concerns.
Benefit 3: sync at your pace
Content can be synchronized in three modes:
- Realtime sync: publish automatically after content changes, useful for frequently updated sites;
- Daily sync: collect changes and publish at a set time, useful for a team release rhythm;
- Manual sync: publish only when you click deploy, useful for important pages or campaigns that need review.
How to use it
Open Settings → Cloudflare Deployment and follow the lightweight guide:
- Make sure your domain is already on Cloudflare;
- Enter the primary domain, for example
example.com; - Add alias domains such as
www.example.comif needed; - Open the Cloudflare token template and create a token;
- Paste the token back into gcms and save the config;
- Deploy from the status section, then check static output, DNS and sync behavior.
Worker Assets is the recommended default because it gives stronger entry control and route protection. If you prefer project-style deployment records in the Cloudflare dashboard, switch to Pages in advanced settings.
Where it fits
Product sites, docs, resource directories, blogs and campaign landing pages are all good fits. They are mostly read-heavy on the public side, while editing and maintenance stay private.
Before going live
Cloudflare deployment does not move your admin data. The database still lives on the origin, so keep backing it up. For a first rollout, start with manual sync, verify canonical URLs, RSS, sitemap and image paths, then switch to realtime or daily sync.
Put the public front end on the edge; keep the admin in your hands.